Configure ASAP runners#
Managing local and remote runners#

Fig. 21 Main windows view. The button to access configuration runners widget is highlighted.#
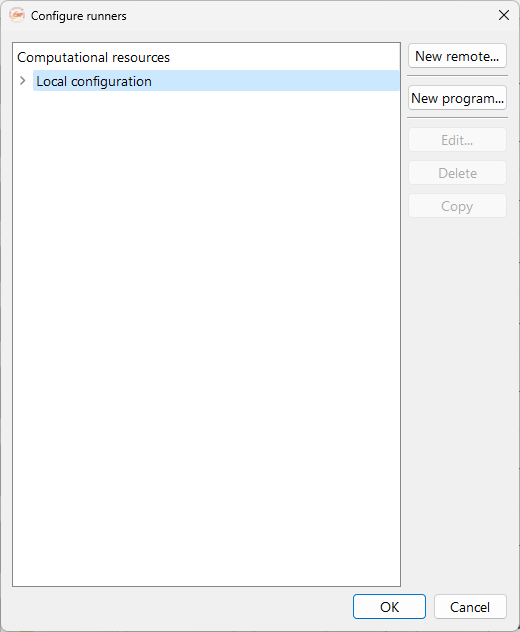
Fig. 22 Configuration runner widget.#
The configuration runners widget offers the following options:
New remote…. Button to access the remote configuration widget. It contains a form that will let you configure the remote connections to clusters/servers for remote computing. See subsection Adding a remote machine.
New program…. To configure an executable on the remote server. See subsection :ref`subsec-adding-new-program`.
Edit…. To edit a previously configured remote machine.
Delete. To delete a previously configured remote connection.
Copy. To copy a previously created remote configuration.
Adding a remote machine#
Click on the New remote… button to access the remote configuration widget. It contains a form that will let you configure the remote connections to clusters/servers for remote computing, as illustrated in Fig. 23.
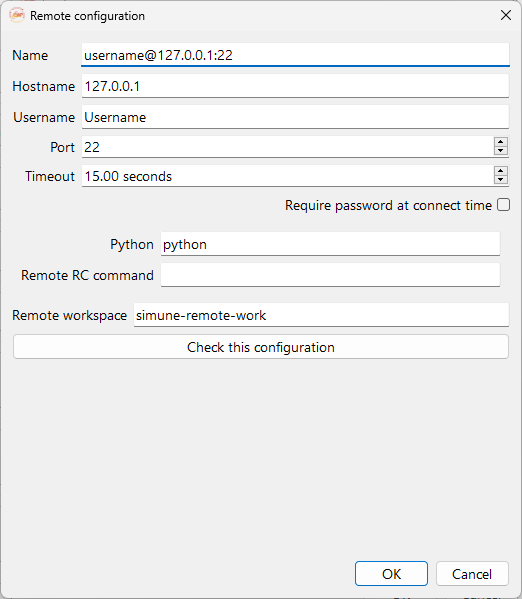
Fig. 23 Remote configuration widget. You can set up your remote machine here.#
Name: Name of the remote connection, up to the user preferences.
Hostname: IP address of the remote server.
Username: Username of the user in the remote server.
Port: To adjust the network port used to connect through SSH. At present, this field must be non-empty.
Timeout: To setup the network timeout. At present, this field must be non-empty.
Required password at connection time: If checked the user is required to input the remote server password in order to connect.
Python: Tells ASAP where to find the python interpreter.
Remote RC command: Tell ASAP how to set the remote environment appropriately before running simulations. Please follow the recommendations described in section Install Python package on the remote server.
Remote workspace: Workspace to use for the simulations on the remote server. If no absolute path is given, the remote workspace will be considered relative to the remote user home directory.
Finally it is possible to run a check to test the connection to the server with the selected python environment, by clicking on the Check this configuration button.
Adding a program#
Click on the New program… button to configure an executable on the remote server.
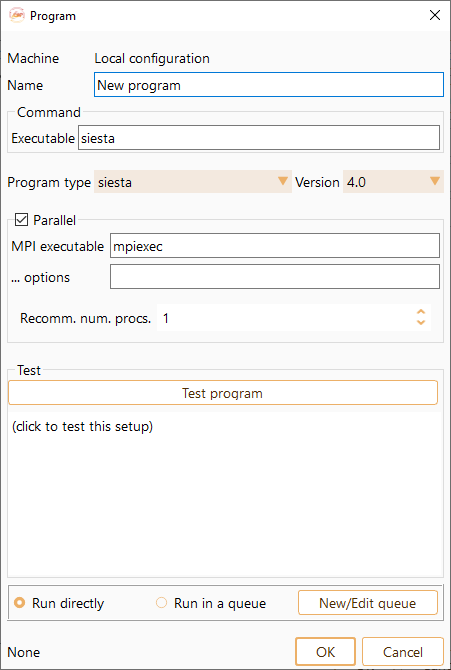
Fig. 24 Widget to configure the runner on the local or on a remote machine.#
Here we list the options of the Program widget:
Name: Name of the program.
Executable: Executable program path on the local or remote machine.
Program Type: Two drop-down menus that allow you to select the program and its version. There are three available options: SIESTA, TranSIESTA and TBtrans (see Fig. 25).
MPI executable: MPI executable path on the local or remote machine.
… options: Use this field to include any additional commands not mentioned above but supported by the selected batch scheduler vendor.
Recomm. num. procs.: Default number of processors suggested by ASAP for this program.
Test program: Click this button to test the program.
Select New/Edit queue to open the Batch Scheduler Configuration widget.
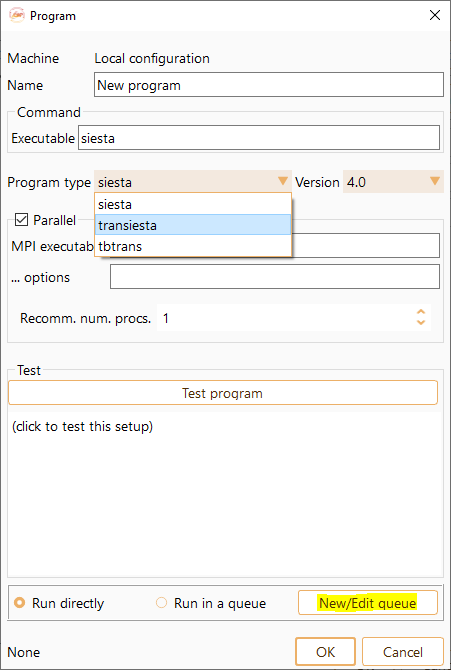
Fig. 25 Batch Scheduler Configuration Widget#
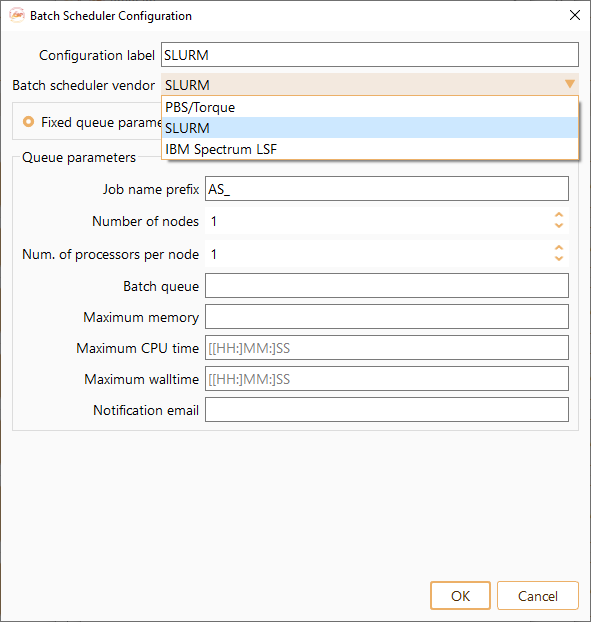
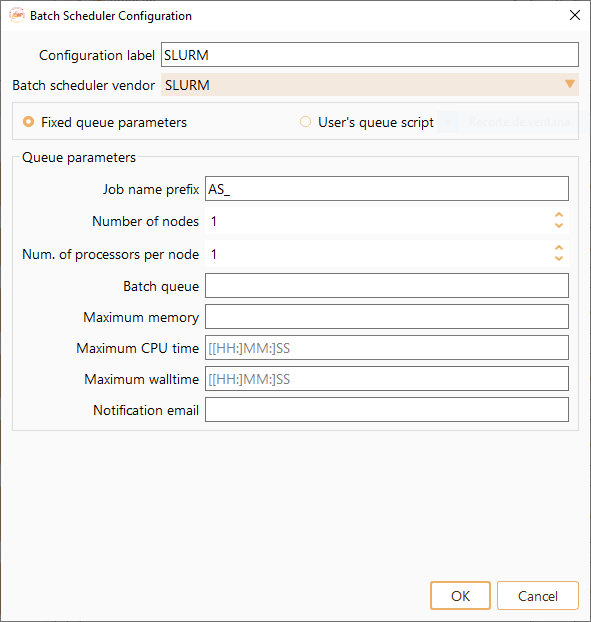
Configuration label: The name of Batch Scheduler Configuration.
Job name prefix: A word, letter or number to be placed before the identification number of the job. You can edit this prefix at your convenience.
Number of nodes: The number of nodes in a job.
Number of processors per node: How many processors are reserved for each node.
Batch queue: Queue name.
Maximum memory: Maximum required memory for the job.
Maximum CPU time: Maximum CPU time per node.
Maximum walltime: Maximum number of hours you want to run your job.
Notification email: User email specification.
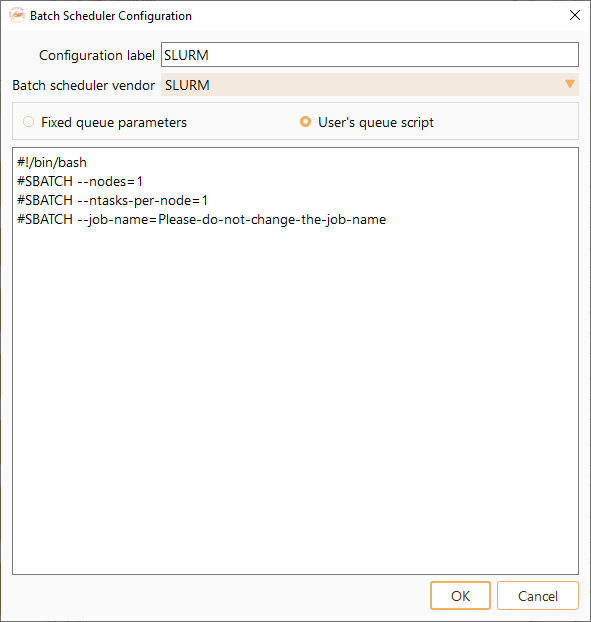
Alternatively, you can use the user’s queue script. This way you will be able to fully customize script to submit the job.
Troubleshooting#
Activate ASAP Python enviroment in the user’s queue script#
In some cases, depending on the cluster environment, the calculation starts running and it stops a few seconds after. In such cases, it might be necessary to add the command to activate the environment (see Remote RC command, Adding a remote machine) at the end of the user’s queue script (see Adding a program).