ASAP basics#
ASAP workflows#
SIMUNE has designed ASAP workflows to help the user in all necessary steps involved in a computer simulation aimed to study and characterise material properties:
Preparing the material model (Edit structure).
Defining the properties of interest (Edit project).
Setting up the input parameters for the simulation (Edit calculator).
Running/submitting the calculation (Run).
Analysing results (Analysis).
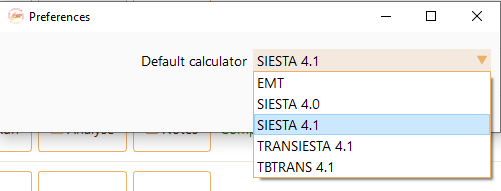
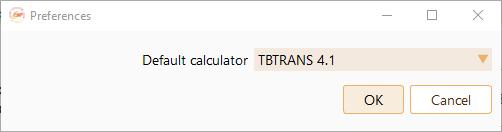
Preferences in ASAP#
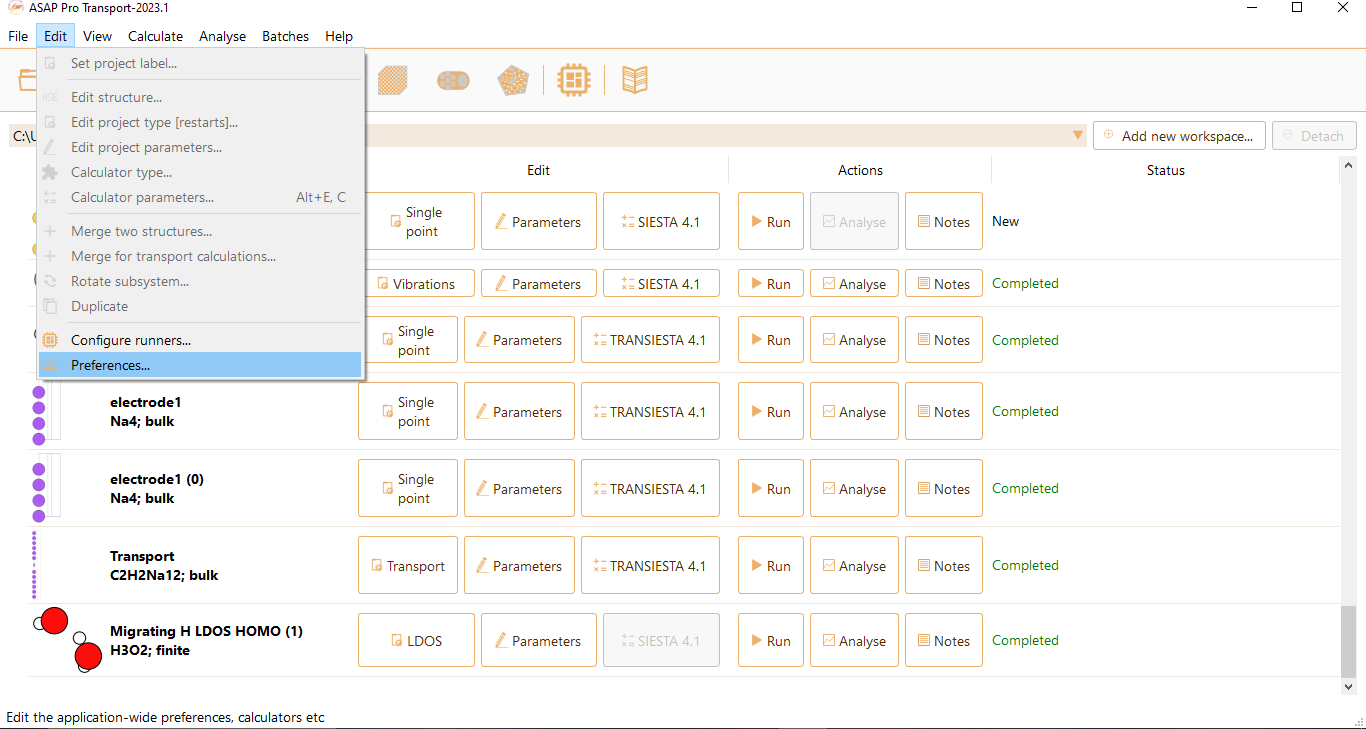
The main window and project tray#

Fig. 9 ASAP main window.#
Open project. The project is added to the project tray.
Duplicate project. To add a copy of the selected project to the project tray.
Delete project. To remove the selected project from the project tray.
Close project. The selected project is closed. It is not visible anymore in the project tray. The related project files are not deleted.
Open terminal at project location. To open an ASAP terminal at the location of the selected project.
Start a new project by creating a molecular structure.
Start a new project by creating a surface (2D system).
Start a new project by creating a bulk (3D system).
Start a new project by creating a nanotube.
Start a new project by creating a cluster.
Configure runners. You can manage local and remote runners.
Open the user manual.
Add new workspace… To create different workspaces and gather projects by similar characteristics.
Rename. To rename a workspace.
Notes. Button to write notes about the selected project.
Button to analyse the obtained results.
Project tray. It contains all the active projects.
Project status: New, running, completed, cancelled, failed.
Button to Run/Launch the simulation.
Button to select the calculator and edit calculator parameters.
Button to edit project parameters (settings, variables and properties).
Button to select the project type.
Project label.
View and edit the structure: Use double click to open ASE graphical user interface.
Managing projects in ASAP: Menu bar#

Menu bar: File#
The file tab allows the user to manage the projects easily:

Create new. Starts a new project with the desired type of structure. (See chapter The atomic structure builder)
The default project file is “project-XX” and it is created in the selected workplace (see section Preferences in ASAP). Furthermore, the default project type is the single point calculation, but you can edit this easily (see section The main window and project tray).
In addition,if you want to know the location of the selected project you can view it on the bottom of the window, once selected.
New Project. Creates a new type of project (See section Overview of ASAP Workflows) of the selected structure.
Open. Allows you to open .json and .asap files.
Open in terminal. Opens up a terminal linked to the selected ASAP project.
Close. Eliminate from the project from the tray.
Save. Saves modifications done to the previous saved version.
Save as. Saves the selected project file (.asap) under a specific name and directory. If you select a set of projects, it will also save them in the directory of your choice.
Import. Allows you to open different types of files.
Export. Saves different types of file.
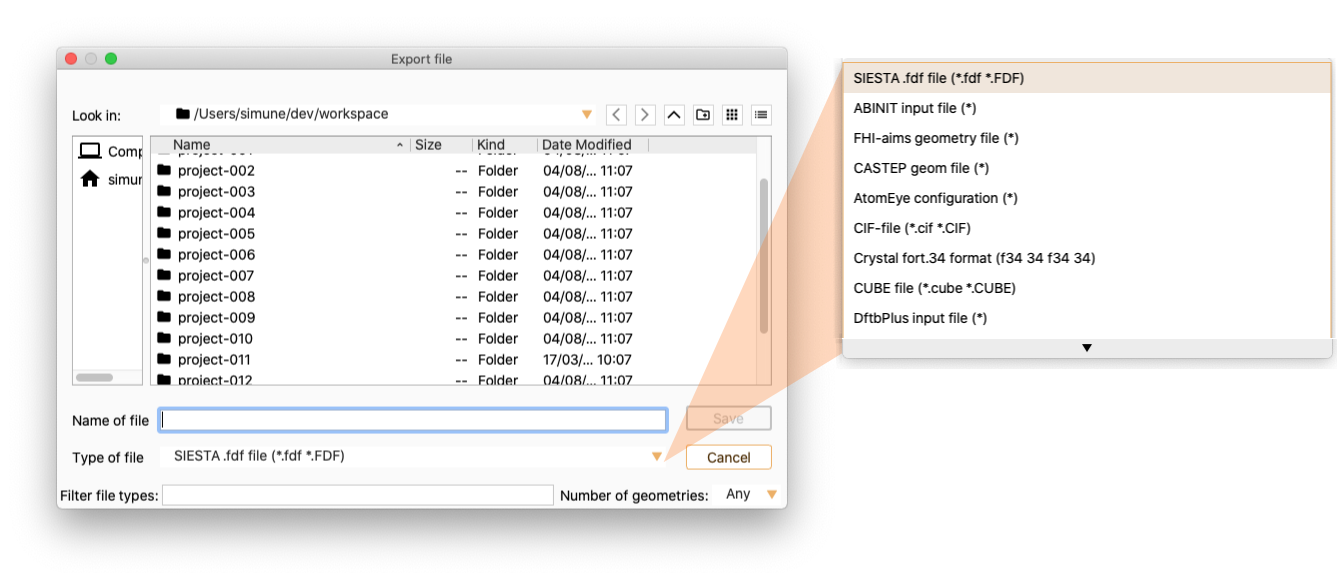
Fig. 10 Type of file options#
Delete. Erases the project from both the project tray and the computer all together.
Exit. Closes the software.
Menu bar: Edit#
The edit tab allows the user to make all the available changes in the projects.
Most of those options have an in depth explanations throughout the guide and are easily accessible with the main window or by using the left click in the mouse on top of the desired project (See section The main window and project tray).

Set project label. Changes the project name.
Edit structure. Opens up the structure’s editing option using ASE GUI (See section ASE GUI in ASAP).
Edit project type. Creates a duplicate of the selected structure allowing the user to restart the project type.
Edit project parameters. Opens up parameter widget (See chapter Parameters).
Calculator type. Opens up the tool to choose the computational engine (See chapter Calculators).
Calculator parameters. Opens up the tool to edit the SIESTA parameters (See section The SIESTA Calculator).
Edit variables. Gives you the different variable edit options (See section Variables).

Fig. 11 Edit variables options#
Merge two structures. Allows the user to combine two structures. (See section Merge two structures)
Merge for transport calculations.
Rotate subsystem.
Duplicate. Makes a copy of the selected project. If the selected project is completed, a widget will pop up to choose whether you want to copy the results or not.

Click on the Duplicate also results? check box to maintain the results on the copied project.
Configure runners. Opens up the configuration runner widget (See sections Quick Start Guide and Advanced Configuration and Remote Execution).
Preferences. Opens up the preferences widget (See section Preferences in ASAP).
Menu bar: View#
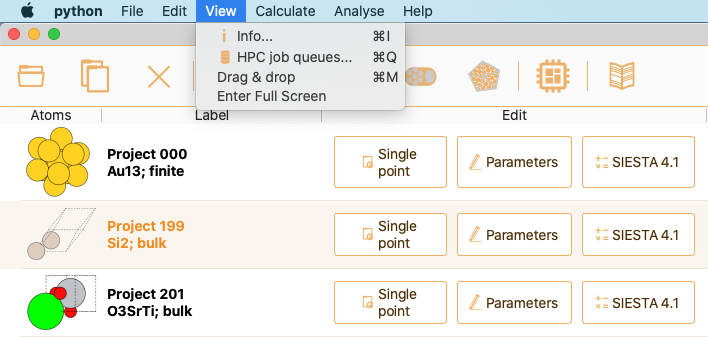
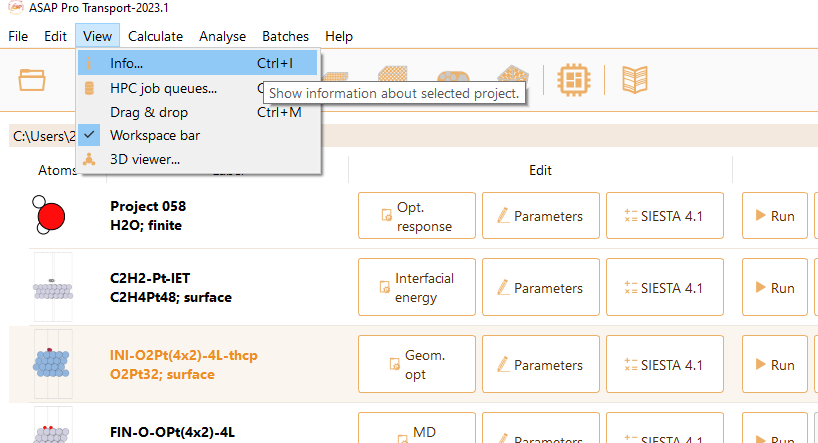
Info…. To retrieve information about a particular project. See section ASAP project information for further information on the Info widget.
- HPC job queues…. Opens up a widget with information of the state of the HPC job queue of remote servers. A job queue is a data structure used to manage and schedule the execution of computational tasks in a cluster. It serves as a central system that coordinates and prioritizes the allocation of computing resources to various jobs submitted by users in order to optimise run time and efficiency.This widget allows you to connect to the selected server by clicking the Connect button, as well as updating the status of currently running jobs by selecting the button Update. You can also stop projects by clicking the Cancel running jobs buttons.Click the OK to save changes and close the widget.

Drag :math:`&` drop. Enables and disables the option to move the position of the projects in the tray.
3D viewer… Allows you to visualise a 3D representation of the structure of the chosen system. See The atomic structure builder for further information on the 3D viewer.

Menu bar: Calculate#
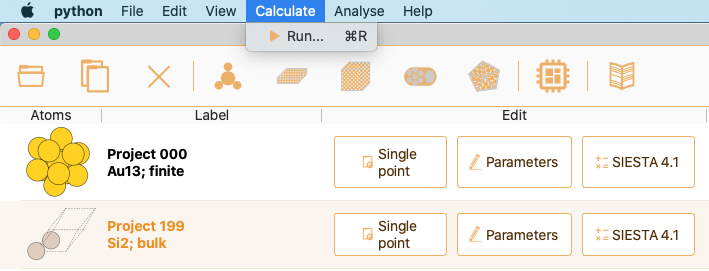
Run. Opens up the run widget (See chapter The run widget).
Menu bar: Analyse#

Analyse. Opens up the analyse widget of the selected project.
Analyse PDOS file. Allows you to upload a PDOS file to visualise the partial density of states of the system. See section Partial DOS for more details.
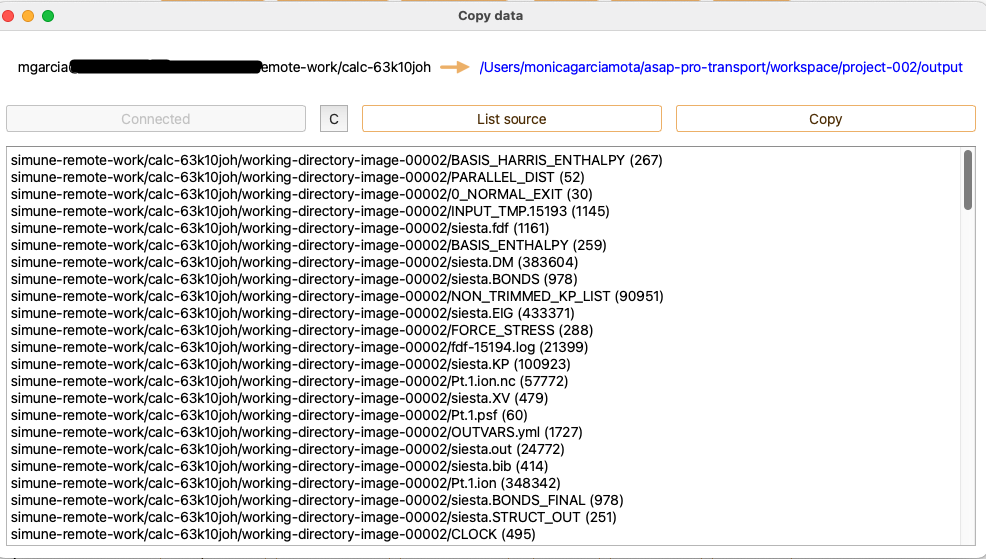
Copy all files from remote. To copy files from a remote folder.
Unit conversion. Opens up the unit conversion widget. Unit conversion facilitates unit conversions of different quantities: energy, length, force, time and mass.

Menu bar: Batches#

Project type… Allows you to set a certain project type for the selected batch.
Project settings… You can establish common project settings for the selected projects.
Calculator type… You can set up a common calculator for all the selected projects.
Calculator parameters… You can set up a common calculator set of parameters for the batch.
Run parameters… You can set up common run parameters for the set of selected projects.
Analyse… Opens up the Batch analysis widget.
See chapter Batch jobs for further information on Batch submission functionality.
Menu bar: Help#

User manual. Opens up the ASAP user manual.
Licences. Opens up a widget with all the licenses ASAP uses.

Fig. 12 Licenses widget#
Download Siesta. Opens up the siesta download widget (See section The SIESTA Calculator).
Open log file. Opens up a window with an automatically produced data file that contains a record of events from certain software and operating systems. Log files show whether resources are performing properly and optimally.

Click on the Backward button to scroll to the end of the file and click on the Forward button to scroll to the beginning.
About dev. Opens up a window with general information about ASAP.

Fig. 13 General information about ASAP#
Managing projects in ASAP: Context menu#
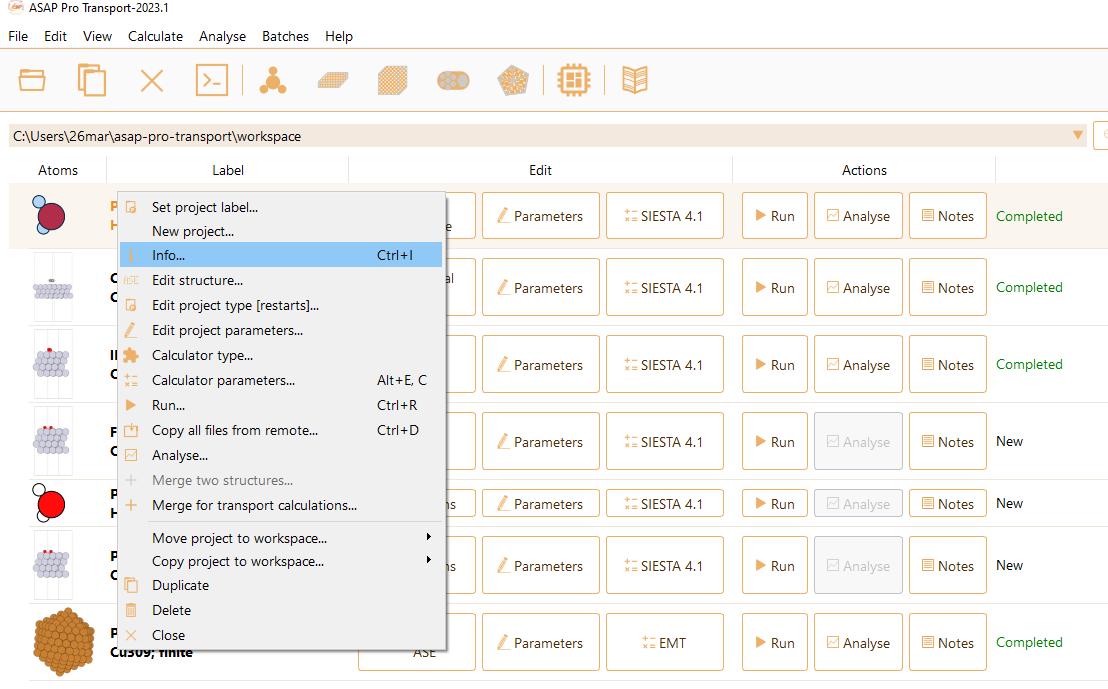
Select a project and then right-click it to access the menu as shown in the figure below.
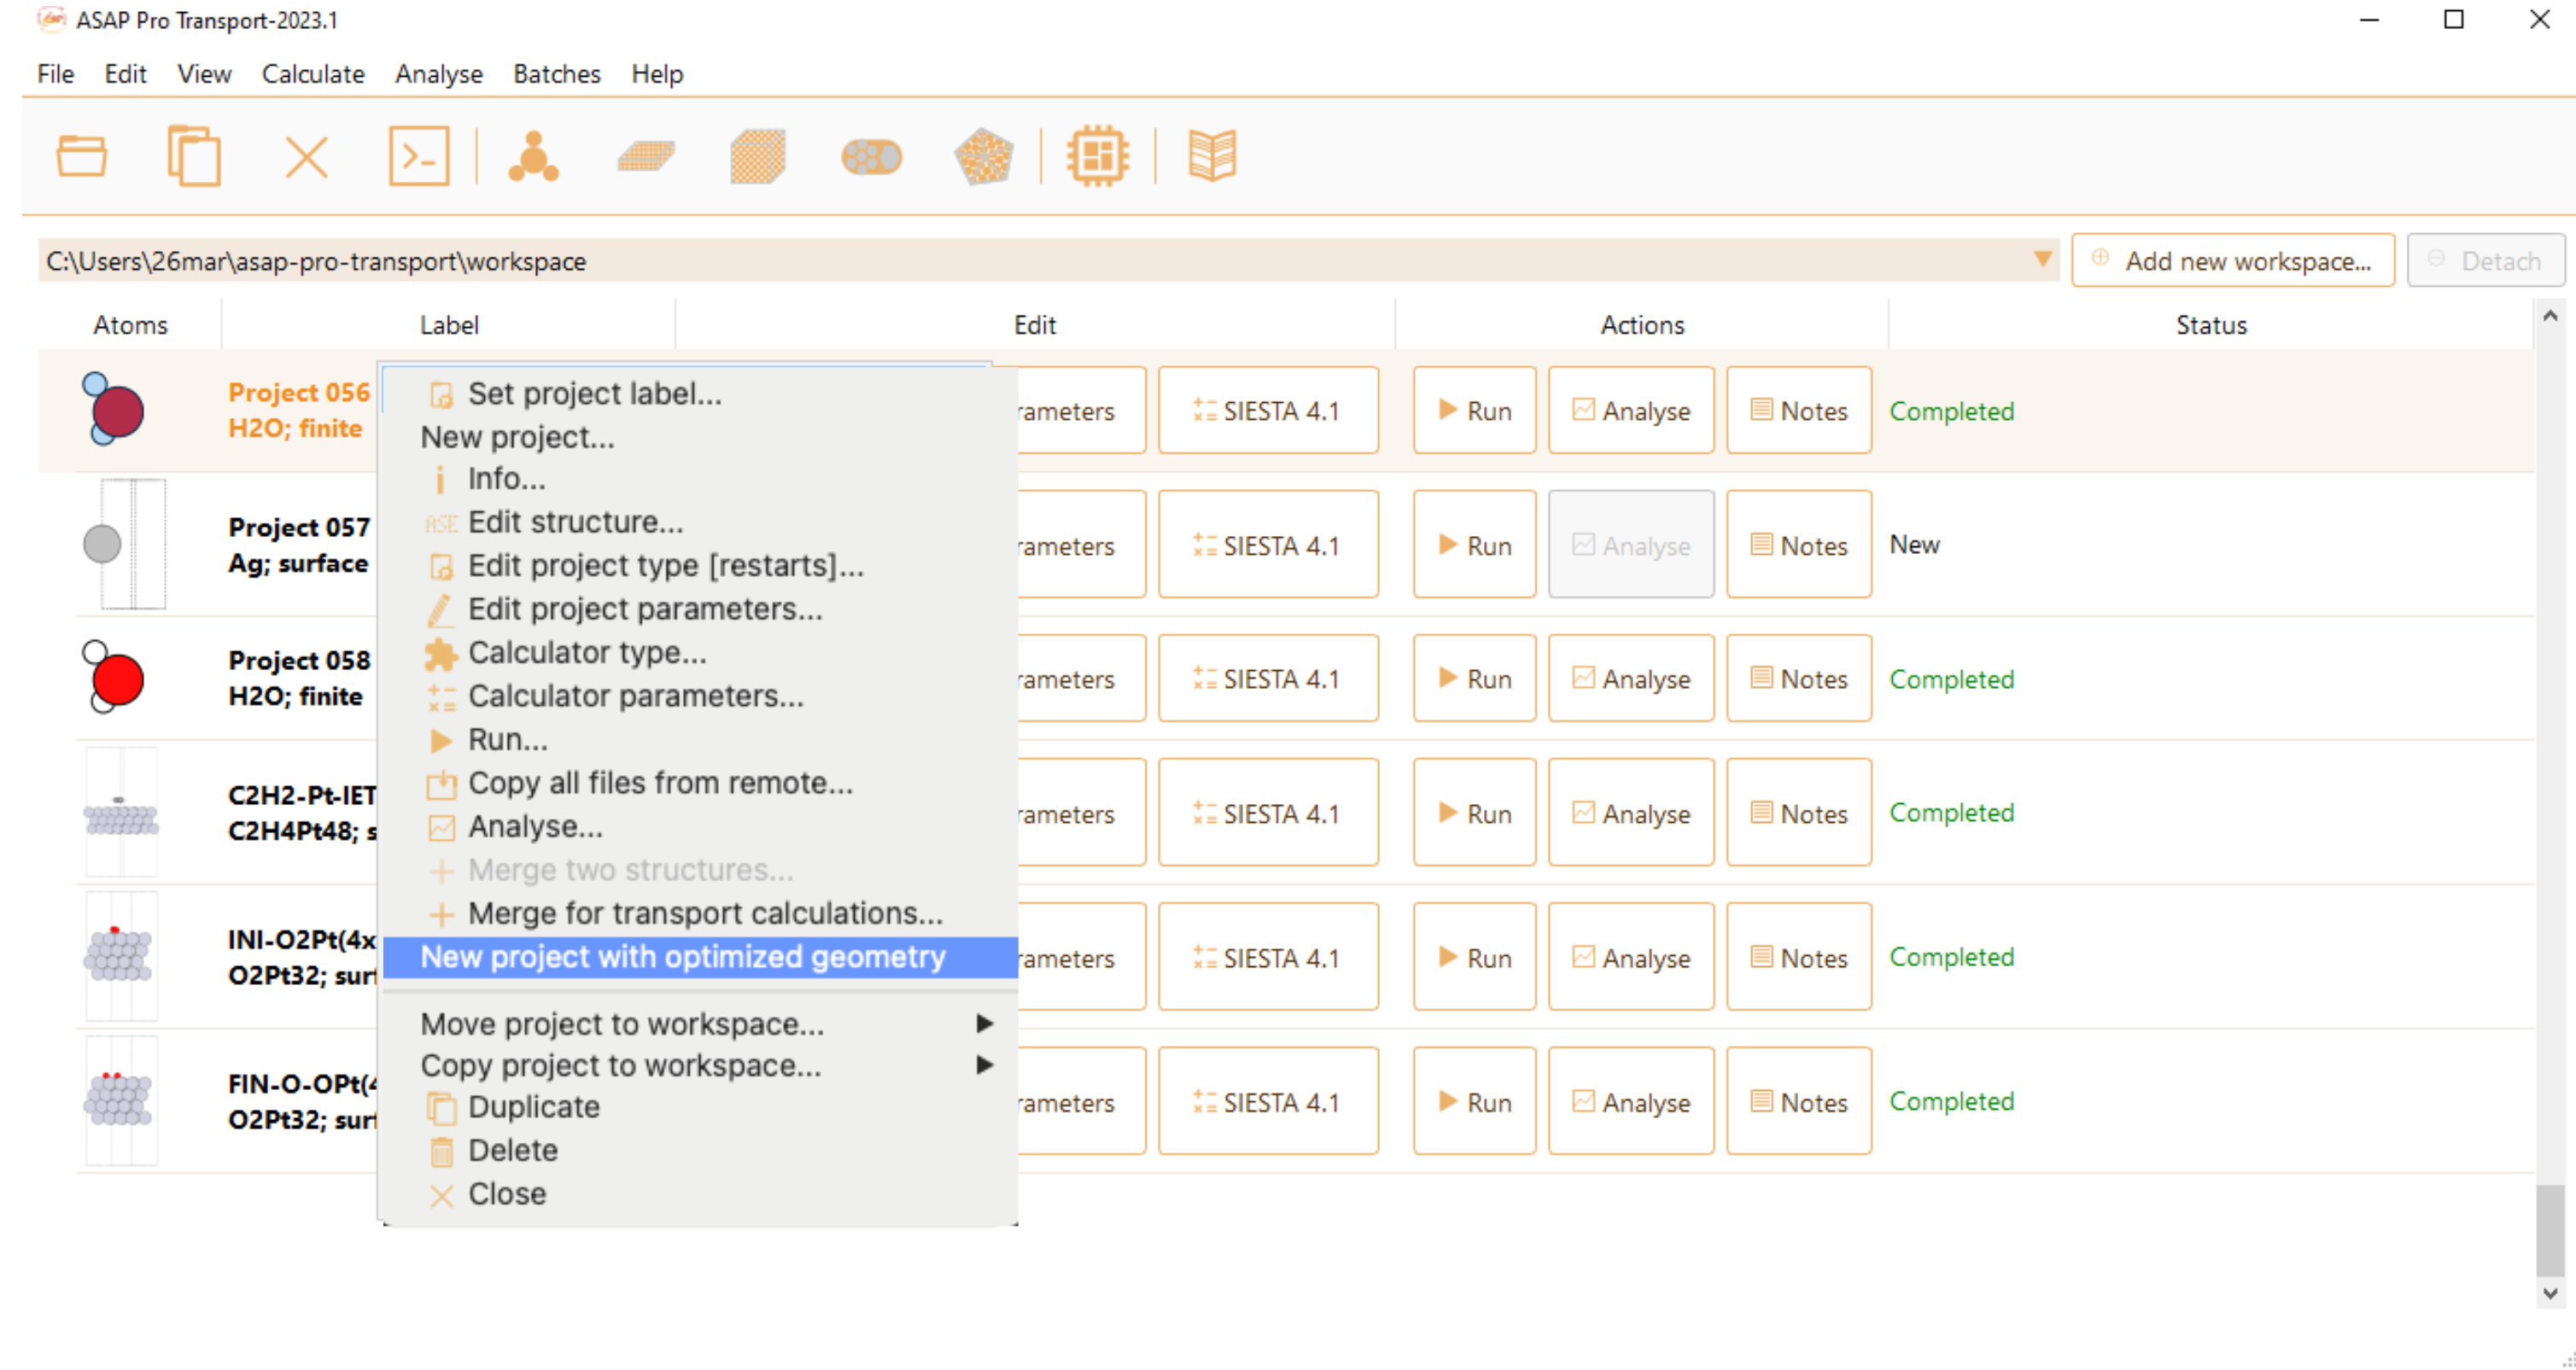
Then, you can execute the following actions:
Set project label… To change the label of the project.

New project… Create a new project by duplicating the atomic structure of the selected project. You have the flexibility to define the type of the new project.
Info… Opens a tab with useful information about the project. See section ASAP project information for further information on the Info widget.

Edit structure… Opens a tab that contains dropdown menus that allow you to tune different characteristics of the atomic structure. See section ASE GUI in ASAP for further information on ASE-GUI in ASAP.

Edit project type [restarts]… To change the type of the selected project. If the project is completed, this action will restart it and remove the previous results.

Edit project parameters… Opens the Parameter tab of the selected project.
Calculator type… To change the calculator type.

Calculator parameters… Opens the Calculator parameters tab. See chapter Calculators for further information on ASAP calculators.
Run… Opens the Run tab. See chapter The run widget for further information on the Run tab.
Copy all files from remote… To copy data from a remote folder.
Analyse… Opens the Analyse tab. Note that the project must be successfully completed. See chapter Analysis for further information on the Analyse tab.
Merge two structures… You must select two projects to enable this action. This will open a new tab to specify the characteristics of the merger. See section :ref:`sec-merge-two for more details on merging two structures.
Merge for transport calculations… Opens a widget to specify the characteristics of both of the electrodes and the contact that constitute the system. This structure is needed to perform transport calculations. See section Merge for transport calculations for a more in-depth explanation.
New project with optimized geometry This option is only available when selecting a geometry optimisation type of project. It creates a new project that contains the previously optimised structure. You have the flexibility to define the new project type afterwards.
Move project to workspace… See section The main window and project tray for further information on flexible workspaces.
Copy project to workspace… See section The main window and project tray for further information on flexible workspaces.
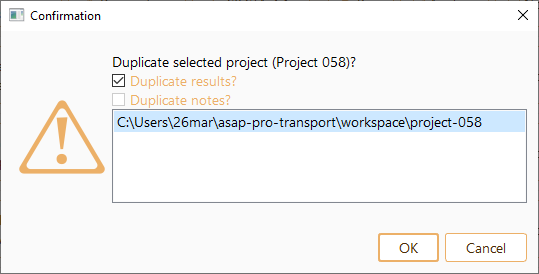
Duplicate To duplicate the selected project. You can choose whether to duplicate results, notes or both. Additionally, you can select to duplicate the selected project in any of the existing workspaces.
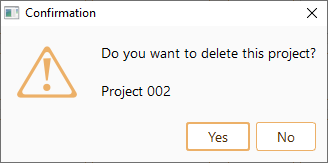
Delete To erase the project from both the project tray and the computer. A confirmation tab will pop up.
Close To remove the chosen project from the project tray, with the option to reopen it at your convenience.
ASAP project information#
To retrieve information about a particular project start by selecting the project of interest. Next, click on the View button in the menu bar. Then, click Info… in the dropdown menu.
Alternatively, select a project and right-click it. Then press the Info… button as shown in the image below.
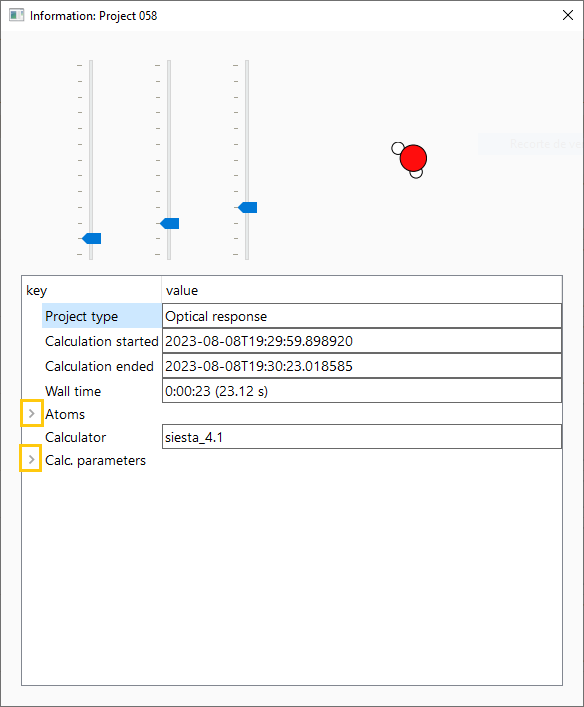
Project type. The type of the selected project.
Calculation started.# Date and time when the process started.
Calculation ended.# Date and time when the process ended.
Wall time.# Total run time.
Atoms. Click the “>” symbol marked in yellow in the figure above, to display the following options regarding atomic information:
Chemical formula.
Number of atoms.
Cell. The cell used in the selected project.
Geometry (Ang). Click the “>” symbol to access the following information on the geometry of the system:
The parenthesis shows the index and the atomic symbol of each of the chemical species.
The table displays the coordinates of each of the atom’s position.

Tags. You can use this option to assign a label to each atom. The default tag is “0”.
Initial charges. Click the “>” symbol to access the initial charge of each of the atoms.
Initial magnetic moment. Click the “>” symbol to access the initial magnetic moment of each of the atoms.
Masses. Click the “>” symbol to access the atomic mass of each of the atoms.
Temperature (K). Temperature of the system in units of Kelvin.
Angular momentum. Angular momentum of the system.
Center of mass. Center of mass of the system in the cell.

info. For this option to be available, the structure of the material must be crystalline and the following information should have been previously included in the structure file, such as within a CIF file, for instance.
Spacegroup. Provides information about the translational and rotational symmetries present in crystalline material. Each space group is identified by a unique number and specific setting.
Occupancy. Shows the different kinds of atoms and their indexes.

Calculator. The calculator used in the selected project.
Calc parameters. See chapter Calculators for further information on ASAP calculators and calculator parameters.

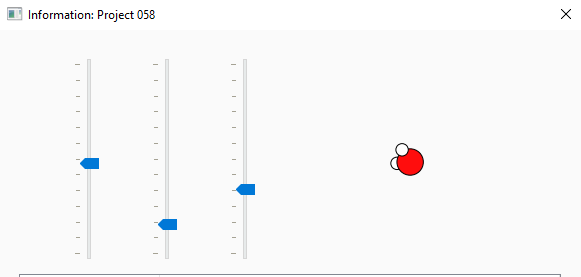
You can rotate the figure of the element around three orthogonal axes by 180 degrees by tuning the blue controls at the top left of the widget.
Keyboard shortcuts in ASAP#
We list here the keyboard shortcuts that are availabe in ASAP:
Ctrl+I (Cmd+I for Mac users) to open the Info widget. See section ASAP project information.
Ctrl+D (Cmd+D for Mac users) to copy data from remote file. See subsection Menu bar: Analyse
Ctrl+T (Cmd+T for Mac users) to open a selected project in terminal. See subsection Menu bar: File
Ctrl+S (Cmd+S for Mac users) to save a project. See subsection Menu bar: File.
Ctrl+Shift+S (Cmd+Shift+S for Mac users) to save a project in a selected directory. You can change the name of the saved file. See subsection Menu bar: File
Crtl+Q (Cmd+Q for Mac users) to view HPC queues. See subsection Menu bar: View
Ctrl+M (Cmd+M for Mac users) to enable the drag and drop feature.
Ctrl+E (Cmd+E for Mac users) to export a selected project to a directory of your choice.