Advanced Configuration and Remote Execution#
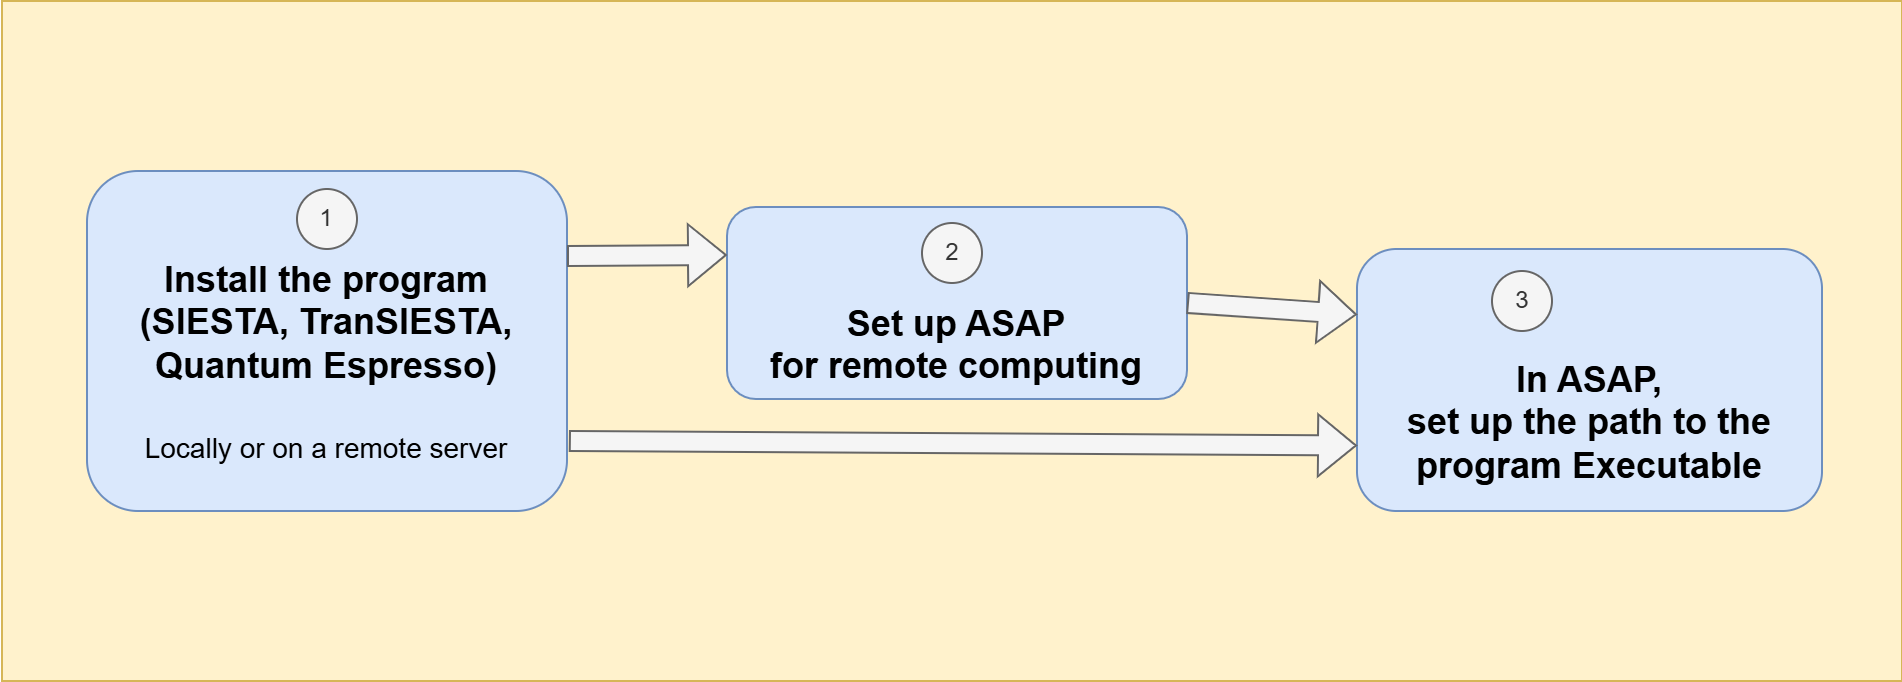
Fig. 3 Scheme illustrating the steps to set up the calculator. For local simulations, Step 2 can be omitted.#
Step 1: Install the program (SIESTA, TranSIESTA, Quantum ESPRESSO) on your local machine or on a remote cluster.
Step 1: Install the program (SIESTA, TranSIESTA, Quantum ESPRESSO)#
SIESTA version 4.1#
SIESTA version 5.x#
Quantum ESPRESSO version 7.4#
Step 2: Set up ASAP for remote computing#
Connect ASAP to a remote machine#

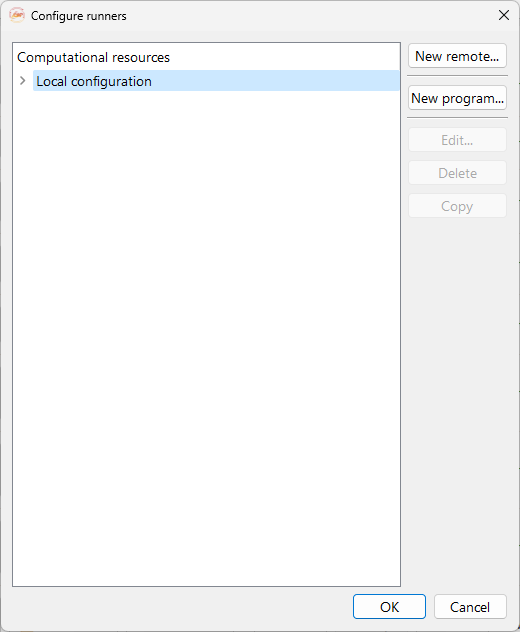
Fig. 4 Configuration runner widget.#
New remote…. To open the configuration widget containing a form that allows you to configure remote connections to clusters or servers for remote computing
New program…. To configure an executable on the remote server. See subsection Step 3: Set up the program.
Edit…. To edit a previously configured remote machine.
Delete. To delete a previously configured remote connection.
Copy. To copy a previously created remote configuration.
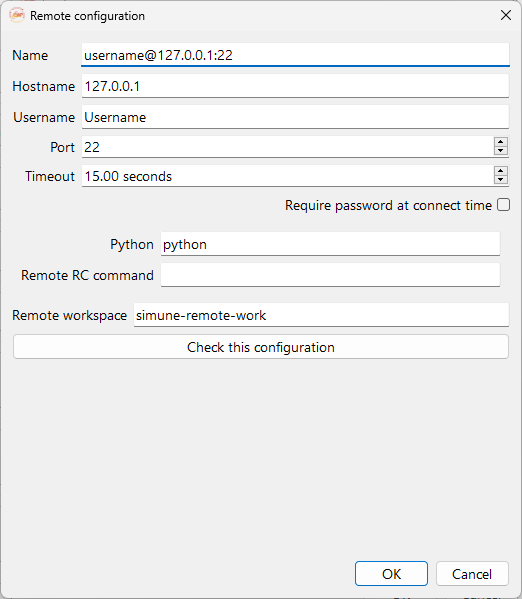
Fig. 5 Remote configuration widget. You can set up your remote machine here.#
Name: Name of the remote connection, up to the user preferences.
Hostname: IP address of the remote server.
Username: Username of the user in the remote server.
Port: To adjust the network port used to connect through SSH. At present, this field must be non-empty.
Timeout: To setup the network timeout. At present, this field must be non-empty.
Required password at connection time: If checked the user is required to input the remote server password in order to connect.
Python: Tells ASAP where to find the python interpreter.
Remote RC command: Tell ASAP how to set the remote environment appropriately before running simulations. Please follow the recommendations described in section Install Python package on the remote server.
Remote workspace: Workspace to use for the simulations on the remote server. If no absolute path is given, the remote workspace will be considered relative to the remote user home directory.
Step 3: Set up the program#
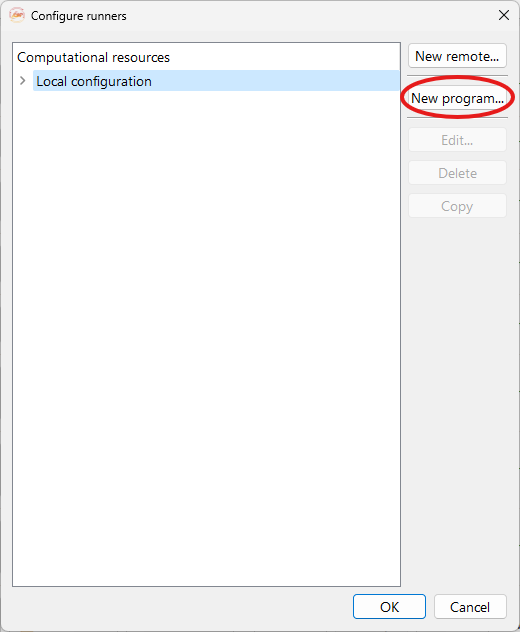
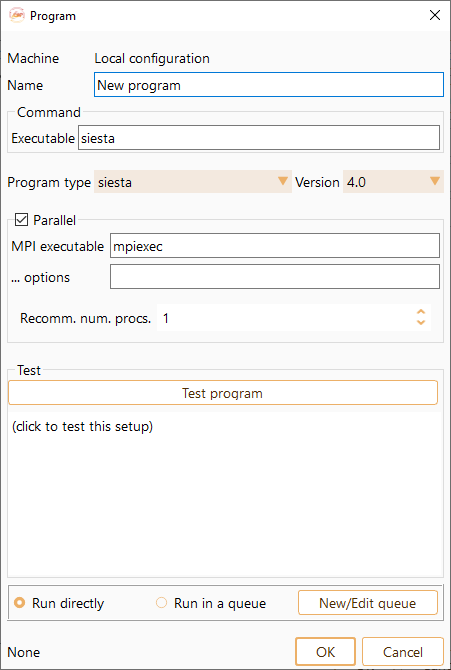
Fig. 6 Widget to configure the runner on the local or on a remote machine.#
Here, we list the options of the Program widget:
Name: Name of the program.
Executable: Executable program path on the local or remote machine.
Program Type: Two drop-down menus that allow you to select the program and its version. There are three available options: SIESTA, TranSIESTA and TBtrans (see Fig. 7).
MPI executable: MPI executable path on the local or remote machine.
… options: Use this field to include any additional commands not mentioned above but supported by the selected batch scheduler vendor.
Recomm. num. procs.: Default number of processors suggested by ASAP for this program.
Test program: Click this button to test the program.
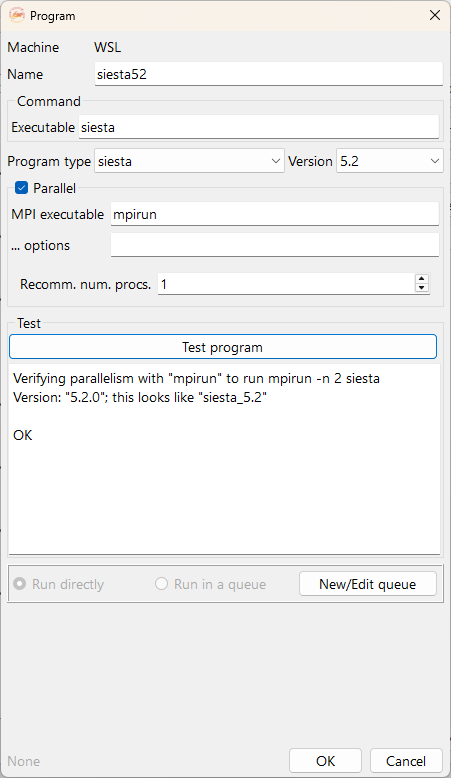
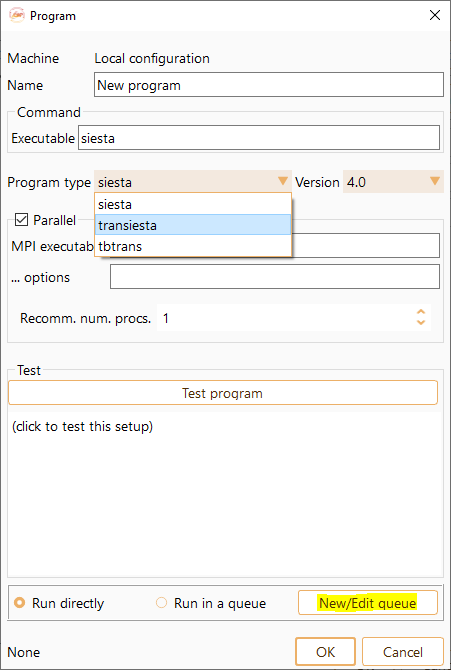
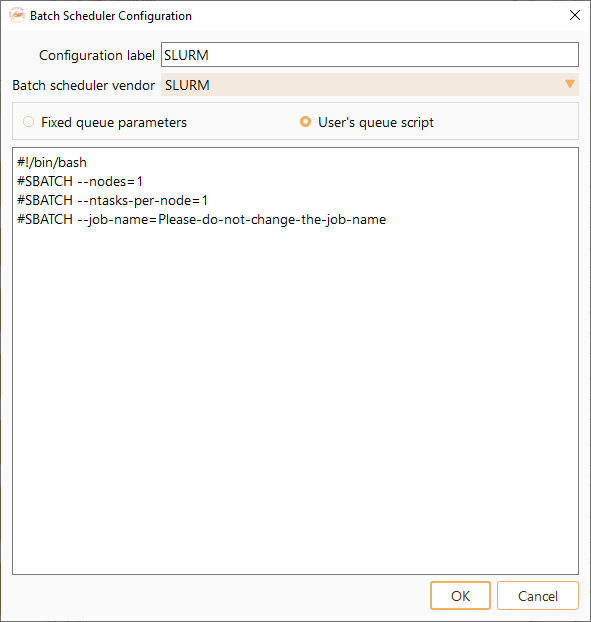
Fig. 7 Batch Scheduler Configuration Widget#
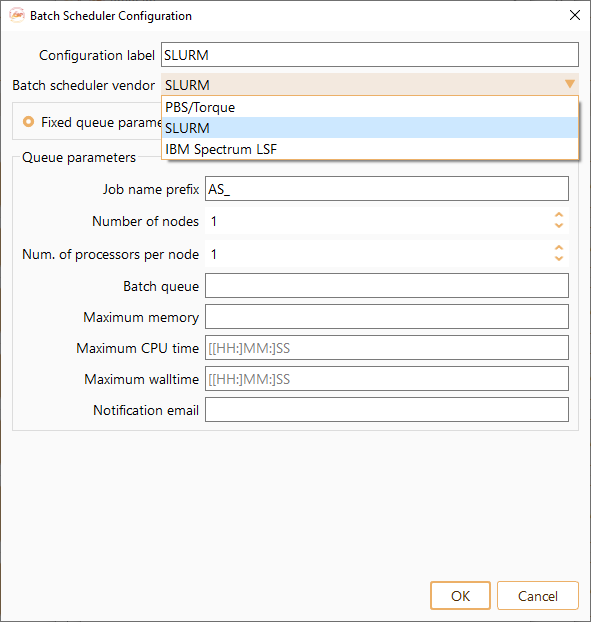
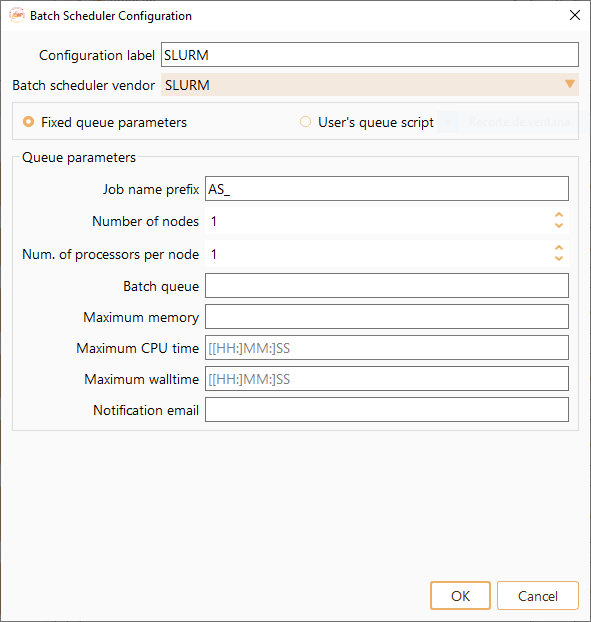
Configuration label: The name of Batch Scheduler Configuration.
Job name prefix: A word, letter or number to be placed before the identification number of the job. You can edit this prefix at your convenience.
Number of nodes: The number of nodes in a job.
Number of processors per node: How many processors are reserved for each node.
Batch queue: Queue name.
Maximum memory: Maximum required memory for the job.
Maximum CPU time: Maximum CPU time per node.
Maximum walltime: Maximum number of hours you want to run your job.
Notification email: User email specification.
Annex 1: Install SIESTA and Quantum ESPRESSO using Miniconda#
Download and install Miniconda#
Create and activate a Conda Python environment for SIESTA#
conda create -n py311 python=3.11
conda activate py311
Install SIESTA & TranSIESTA 5.2#
conda install -c conda-forge siesta
conda install conda-forge::scalapack
conda install -c conda-forge "siesta=5.2=*openmpi*"
conda install -c conda-forge "siesta=5.2=*mpich*"
Verify SIESTA installation#
siesta --version
Executable      : siesta
Version         : 5.2.0
Architecture    : x86_64
Compiler version: GNU-13.3.0
Compiler flags  : -march=nocona -mtune=haswell -ftree-vectorize -fPIC -fstack-protector-strong -fno-plt -O2 -ffunction-sections -pipe -isystem <prefix>/include -I<prefix>/_build_env/include -fdebug-prefix-map=<prefix>/work=/usr/local/src/conda/siesta-5.2.0 -fdebug-prefix-map=<prefix>=/usr/local/src/conda-prefix -I<prefix>/lib -fallow-argument-mismatch -O3
Parallelisations: MPI
...
Install Quantum ESPRESSO#
conda install conda-forge::qe
Verify Quantum ESPRESSO installation#
pw.x
Program PWSCF v.7.4 starts on  8May2025 at 10:32:36

This program is part of the open-source Quantum ESPRESSO suite
for quantum simulation of materials; please cite
    "P. Giannozzi et al., J. Phys.:Condens. Matter 21 395502 (2009);
    "P. Giannozzi et al., J. Phys.:Condens. Matter 29 465901 (2017);
    "P. Giannozzi et al., J. Chem. Phys. 152 154105 (2020);
     URL http://www.quantum-espresso.org",
in publications or presentations arising from this work. More details at
http://www.quantum-espresso.org/quote

Parallel version (MPI & OpenMP), running on       1 processor cores
Number of MPI processes:                 1
Threads/MPI process:                     1

MPI processes distributed on     1 nodes
2985 MiB available memory on the printing compute node when the environment starts

Waiting for input...
Annex 2: Install parallel libraries#
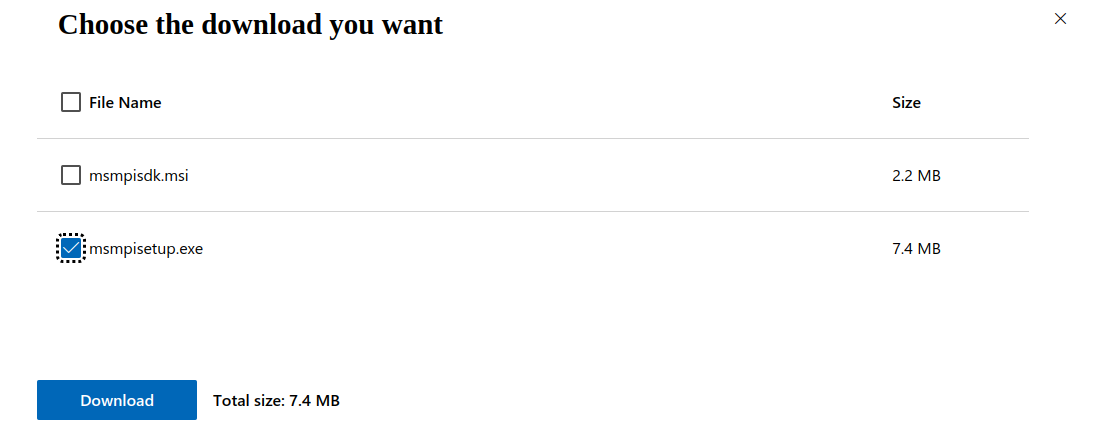
Windows: Installing Microsoft MPI v10.1.3#
Debian/Ubuntu/Mint: Installing Scalapack Openmpi library#
sudo apt install libnetcdff-dev libopenblas-openmp-dev libscalapack-openmpi-dev openmpi-bin
Annex 3: Configure remote server#
Make sure the user on the local computer can connect through SSH. See section SSH connection.
Make sure that you have access to the correct version of Python 3 on the remote server. See section Python interpreter.
SSH connection#
Install OpenSSH#
Type app in the start search bar.
Select “settings app”.
In the “Window Settings” which appears, click on “Apps”.
Then click on “Optional features” and “Add a feature”.
Look for OpenSSH Client, click on it and install.
SSH public-key authentication#
Generate public-private SSH key pair on Windows 10#
Open a powershell instance and use ssh-keygen to generate the public-private SSH key pair:
ssh-keygen
Follow the instructions to generate the id_rsa, id_rsa.pub files.
Register the local public key on the remote server#
cd $HOME/.ssh
and list the files in the folder:
ls
Python interpreter#
python
and typing the following commands in the Python console:
import pip
import venv
Ctrl-D (or
Cmd-D on MacOS).You do not have Python already available in your machine: Miniconda#
Install python3.12 enviroment by typing,
conda create -n py312 python=3.12
conda activate py312
Install Python package on the remote server#
The package necessary to install the python libraries that ASAP needs to run a simulation on a remote server can be downloaded using the following links
simune-asap-remote-env-2024.1.3 for ASAP version 2024.1 and 2025.0
simune-asap-remote-env-2025.1.0 for ASAP version 2025.1 and 2026.0
You should now have downloaded the package simune-asap-remote-env-XXXX.X.zip on your computer.
Please follow the next steps in order to complete the installation.
Copy simune-asap-remote-env-XXXX.X.zip on the remote server. This can be done using scp command, run the following command from your local machine,
scp -r simune-asap-remote-env-XXXX.X.zip <user>@<remote-server>:
Connect to the remote cluster using ssh command and unzip the folder,
unzip simune-asap-remote-env-XXXX.X.zip
and enter the folder
cd simune-asap-remote-env-XXXX.X
If you want to make sure that the installed environment corresponds to a specific version of Python, simply remove the simune-remote-env-py.tgz files associated with the other versions. For instance, if you have a Python 3.10 environment, you would type:
rm simune-remote-env-py3.7.tgz simune-remote-env-py3.8.tgz simune-remote-env-py3.9.tgz
If all files are present, the installer will always try to install the environment for the most recent Python version.
Finally, run the following command,
bash ./install-simune-env.sh
and wait for the script to finish. At the end, it will display instructions and explanations on how to use your new environment with ASAP. Please make a copy of these instructions before closing the connection.
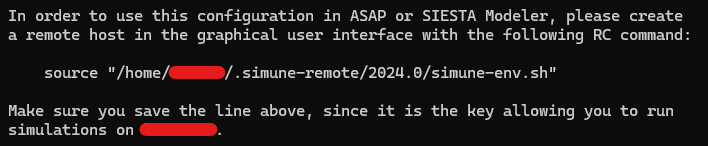
Fig. 8 Copy the line starting with “source” in the remote RC command, please see section Step 2: Set up ASAP for remote computing.#
Troubleshooting#
Cannot connect to remote servers after Windows upgrade#
Set-Service ssh-agent -StartupType Automatic
Then reboot the computer.
If this still doesn’t work, open a normal PowerShell terminal and type:
ssh-add $HOME/.ssh/id_rsa
id_rsa with the
actual key name.Make popular materials modeling codes available to industrial users.
Gather the relevant tools and codes within a unified user interface, in order to improve their usability.
Automate the existing workflows for the simulation of materials properties and industrial problems of interest.
Soler, José M, Emilio Artacho, Julian D Gale, Alberto Garcia, Javier Junquera, Pablo Ordejón, and Daniel Sánchez-Portal. 2002. “The SIESTA Method for Ab Initio order-N Materials Simulation.” Journal of Physics: Condensed Matter 14 (11): 2745–79. https://doi.org/10.1088/0953-8984/14/11/302.